The Rebirth of Mr. Bubbles: A Common-Sense Guide to Not Killing a Betta Fish
If you’ve ever experienced a total household disaster, you know the feeling. One day everything is running smoothly, and the next, your water turns cloudy, things go sideways, and you’re left scratching your head.
Yes, I’m talking about my family’s foray into keeping a betta fish.
Back in May, we welcomed the original Mr. Bubbles into a nice, shiny 3-gallon tank. We had the classic aquarium pineapple, some colorful gravel, and all the best intentions. But as it turns out, maintaining a tiny, 3-gallon aquarium requires a little extra discipline. Without a clear plan, a small tank can get messy fast.
Unfortunately, our first attempt ended in a total cleanup failure. The water turned a mysterious, milky white—a major bacterial bloom—the water quality tanked, and despite our best efforts, we lost him. We had to make a somber, tight-lipped return trip to Petco. RIP Mr. Bubbles v1.
But in this house, we don’t just give up after a setback. We figured out what went wrong, adjusted our strategy, and tried again.
Meet Mr. Bubbles v2—a gorgeous, incredibly spunky Stars & Stripes Betta (a Petco exclusive with patriotic red, white, and blue colors!). We took a slow, steady approach this time. No cutting corners. As of today—July 14th—Mr. Bubbles v2 has been thriving in his clean, stable home for over a month. If you’re trying to keep a Betta alive and healthy in a small desktop tank without triggering another disaster, here is our official, field-tested playbook.
Phase 1: Fixing the Tank & The “Safety Reset”
Before the new guy could move in, we had to fix the environment. The old tank setup was compromised.
-
The 50% Hotfix: We drained half the water to drop any lingering toxins back to a safe baseline.
-
Adding the Essentials: We treated the fresh water with conditioner and added a healthy dose of live starter bacteria liquid to kickstart the natural tank cycle that breaks down fish waste.
-
The Strip Test: To verify the water was safe, we ran a 5-in-1 water test strip. Nitrates? 0 ppm. Nitrites? 0 ppm. pH? A staggering, alkaline 8.5—courtesy of our local Central Texas water. The water was safe, but that high pH meant our next step required extreme patience.
Phase 2: The Overnight Float
When you buy a fish, it lives in a tiny plastic store cup. Dumping him directly into a tank with wildly different water chemistry and temperature is a recipe for instant shock.
Instead, we chose to be patient and do an Overnight Float.
We placed the sealed Petco container directly into the tank and let it float overnight. Because the cup was wedged safely under the tank’s light bar, it stayed perfectly locked in place and didn’t get tossed around by the filter.
Leaving the lights off all night kept his stress levels down and allowed the water temperatures to perfectly align. By morning, the water in his cup was the exact same temperature as the tank, completely eliminating temperature shock.
Phase 3: The Slow Acclimation
The next morning, it was time for the final move.
Because his cup water was likely a different pH than our tank water, we spent a full hour slowly adding small splashes of tank water into his container every 15 minutes. This let his internal systems gently adjust to our hard Texas water.
When it came time to actually release him, we used a clean cup to scoop him out, ensuring absolutely zero store water entered the tank. Store cup water is filled with built-up ammonia and unknown store bacteria—you do not want it in your clean tank.
Phase 4: The Long-Term Success (And the 7-Day Vacation Test)
Mr. Bubbles v2 has been with us for weeks now, and he is doing fantastic! He’s highly active, swimming laps around his pineapple, and lunging for his food like a true champion.
We even put our setup to the ultimate test: a 7-day family vacation. In the past, we might have panicked and bought one of those dissolving, chalky “vacation feeder blocks” (which, spoiler alert, will completely ruin a small tank’s water chemistry and kill your fish). Instead, we prepped the tank, kept the lights off to keep him in a calm, low-energy mode, and just walked away. We returned a week later to crystal-clear water and a healthy, very energetic fish.
Keeping a 3-gallon tank this stable comes down to a highly specific, rate-limited feeding and water-change routine. Since that routine is a science of its own, we’ve broken down our exact step-by-step daily, weekly, and vacation protocols in our companion post: The Blueprint for a Successful 3-Gallon Betta Tank Setup .
Phase 5: Custom 3D-Printed Upgrades
To make life even easier for Mr. Bubbles (and honestly, because I have a 3D printer and wanted an excuse to use it), we added a couple of custom-printed upgrades to the tank that have been absolute game-changers.
-
The Floating Feeding Ring: One issue with small tanks is that water currents from the filter can sweep fish pellets all over the surface. I printed this Floating Feeding Ring . It floats right on the surface, keeping his food corralled in one clean, easy-to-reach spot so the pellets don’t drift away or sink into the gravel.
-
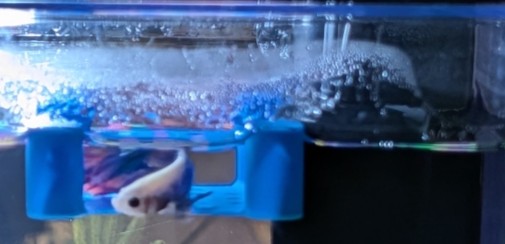
The Floating Betta Bed: Most store-bought betta leaf beds suction-cup to the glass at a fixed point. The problem? If your water level drops even slightly from evaporation, your fish’s bed is suddenly stranded in the open air. To fix this, I printed this awesome Floating Betta Bed . It naturally rises and falls with the water line, meaning it is always perfectly positioned right at the top of the water where Bettas love to lounge.
Summary
We went from a total disaster with our first attempt to a beautifully running, crystal-clear setup with the new Mr. Bubbles. It turns out that a little bit of patience, a strict daily feeding protocol, and a simple weekly 2-cup routine are all it takes to keep the peace.
Now if you’ll excuse me, I’m off to watch Mr. Bubbles lounge on his floating bed like he owns the place!